


I figured this to be a suitable starting point to kick things off. It's a common and expected topic among mixers and producers - a default small talk. I mix hybrid (a combo of both analog and digital). In this post, however, I'll be sharing the details of my much-used, fully digital mix and master bus template.
My mix bus and the processes I’ve applied there have undergone a bit of a morphing journey over the years. Even this week I’ve deviated between the polar positions of applying a light seasoning vs a very flattering, heavy-handed makeover. Never less than a blend of technique and intuition. In this post, I'll be sharing my preferred In-The-Box (ITB) mix bus processing chain and the reasoning behind each chosen component.
Foundation
First, I’ll outline a general-purpose approach which allow me consistency across projects, regardless of the genre I’m tackling. A dependable template that serves as my starting point, ensuring predictability without stifling creativity. While each project introduces its unique twists, having a reliable foundation is key.
I’ve come to settle on a series of types of processors that afford me flexibility while delivering a balance of firmness, colour, and control. I never want to feel cornered in by my master bus during the mixing process, though there are instances where that’s called for, and that can be fun - pushing the music beyond the edges, and what might seem technically ‘correct’ or possible. There’s a very specific excitement in that. The view from the line between technical precision and unwieldy exploration can be compelling, and lead to interesting results.
Depth, Dimension and Centre Power
My focus lies a lot on depth, dimension, and centre power. Perceivable front to back - that’s where the quality and the beauty of a mix is for my tastes, while the centre image carries emotional weight and power. Processing on the mix bus can be counter-intuitive to this goal. Cohesion or ‘glue’ is often equal to the shrinking of contrast. I tend to layer in subtle, small gains to avoid that unwanted outcome. Maintaining contrast and avoiding audible over-processing is crucial.
Many of my mix bus processor choices align with the aim of magnifying depth and dimension - qualities derived from the mix itself.
At a Glance
My typical chain often looks something like the following. It may seem like an alarmingly long list, though not every processor is employed in every case, and even if so, it’s in gentle amounts.
Mix Bus Chain
Broad EQ: Delicate tone shaping, ideally applied before hitting other processors.
Harmonic Processor: Reserved for special use cases, introducing harmonic complexity or richness.
Main Compressor: Light peak control, I want to hear a tiny bit of pinch from this.
Parallel Compressor: Gentle blend for sustain and excitement, enhancing perceived depth
Multiband Compressor: Overall control and a bit of a safety net to keep loud sections sounding pleasant. this is where the most gain reduction happens
Precision EQ: Final tonal nudges for fine tuning.
Master Fader
Clipper: A crucial component to prevent overworking the limiter.
Limiter: The last stage in the processing chain.
Metric AB: Highly important for referencing against other tracks.
I rely on this structured and gradual approach to ensure a balance between subtle tonal enhancements, dynamic control, and final polishing. Keep reading for a more detailed overview and visuals of each specific component.
Workflow Insights
All plugins aside from the multiband compressor are engaged from the start of the mix.
My mix bus is typically peaking around -6 to -4 before hitting the first processor. This gives me enough room to push and pull within my bus processing components.
My mix bus and master bus are separate entities. With the mix bus being a standard aux return, and the master being a Pro Tools master fader for this aux output.
In Detail
Broad EQ
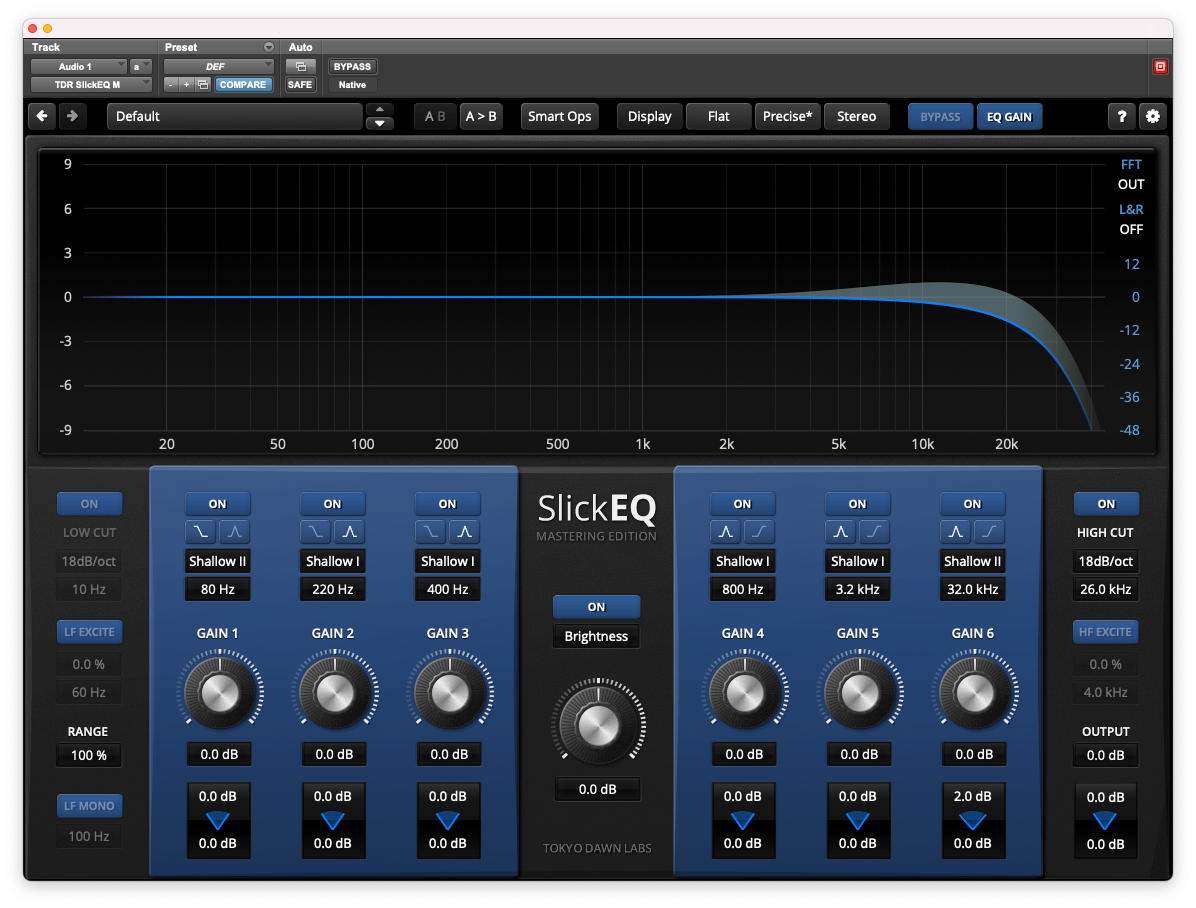
My starting EQ of choice, the TDR SlickEQ M. Quick and clean. I love the functionality of it with its auto-gain feature, preventing deceptive level boosts, and its user friendly mid-side adjustments. Starting by default with some top end filtering: it keeps hf nasties from entering subsequent processes, resulting in a smoother and less bitey top half of the mix (try it!). I’ll also begin the mix with a tiny bit of mid-side widening - subtle, spatial presence.
EQ points set to address common areas of frequency build-ups: 200Hz (snare/bass) 800Hz (vocal/synths), and 3kHz (harshness in vocals, drums). Wide bell curves sound easy and natural here, and I may only adjust by delicate 0.5db dips. In some cases I’ll go further but just as often, not at all. At times I’ll push these points to see if it highlights any potential masking issues.
Saturation
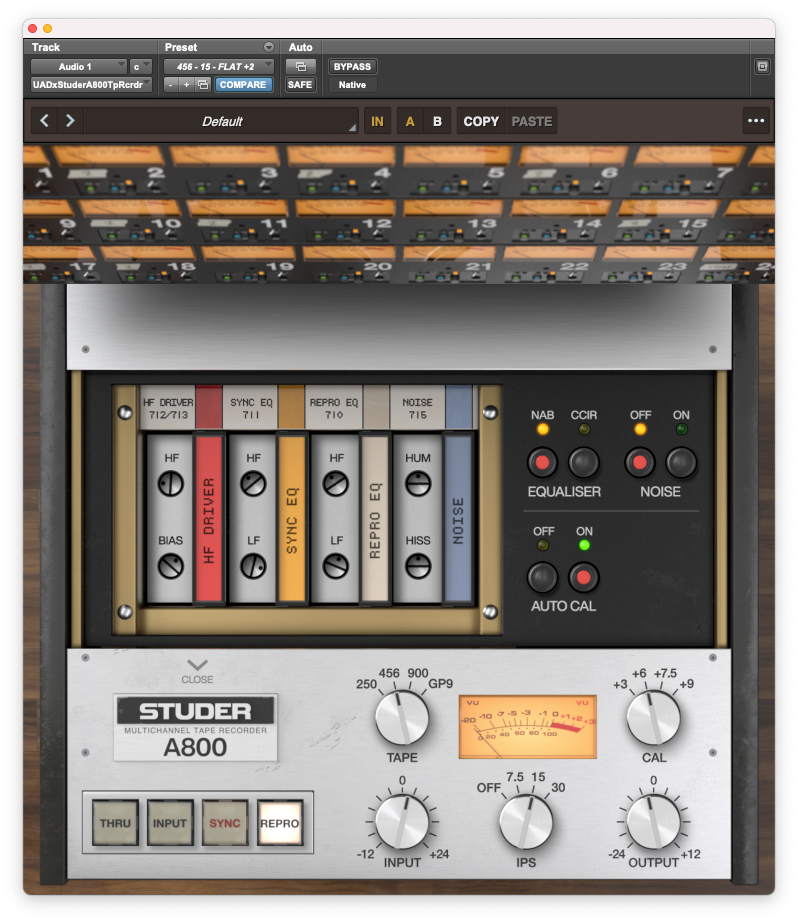
For saturation, I keep two options at my disposal: either the UAD Studer A800 or Toneprojects Kelvin. The choice between them depends on the desired effect; I turn to the Studer when aiming for more pronounced saturation. I enjoy the complexity of its saturation and feel it has a pretty large sweet spot. As for Kelvin… it’s deep, we'll jump into that at another time.
With the UAD Studer, I've made a preset to give me as flat a curve as possible to mix into. Make your way ‘under the hood’ to adjust the EQ settings while monitoring the output through a frequency analyzer. I particularly recommend this process when using plugins that alter the frequency response as much as this - it will save you some tail-chasing in the long run.
The Studer lacks an auto-gain function, so I've created a few level-matched presets that give me the option of hitting the input at +1dB increments while keeping the output level at unity. I'll flick through these settings, kind of like having a headroom control, to see what they do to the image of the mix. Sometimes, the added saturation will give a hint more richness and mystery to the midrange. Rounding off transients in a subtle but pleasing way.
Main Compressor
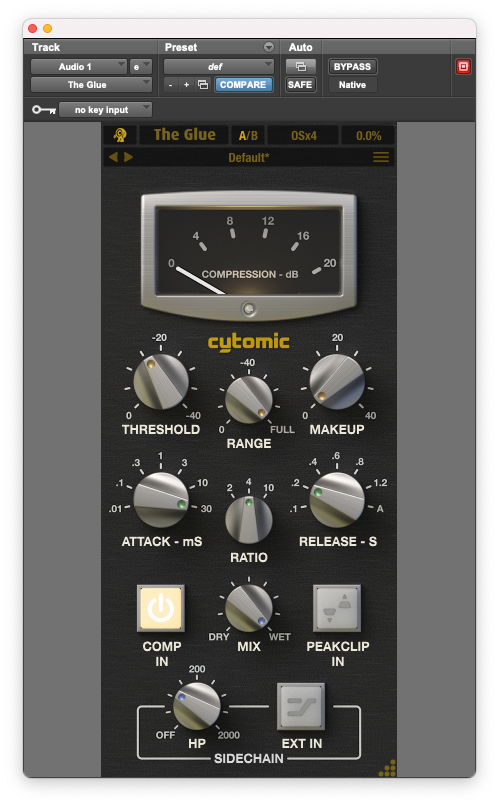
Cytomic The Glue has consistently been my go-to ITB mix bus compressor for many, many years. It’s high fidelity, easy to gauge, and super reliable. Despite experimenting with various alternatives, I always find myself coming back to it.
My settings have remained nearly unchanged throughout the years; I rarely adjust anything beyond the threshold and release from project to project. I like the firmness and slight pinch of a 4:1 ratio, 30ms attack, 0.1 - 0.2s release - pretty classic. Firm yet breathable compression. Maybe 2db of gain reduction during the biggest drop or chorus. Slowest attack almost always, so that I’m not suffocating the mix.
I’ll opt for a slower release in instances where it feels as though the compression is making the transients sound more pokey, or I need that light compression to groove a bit. That said, I’m generally setting this to be almost invisible.
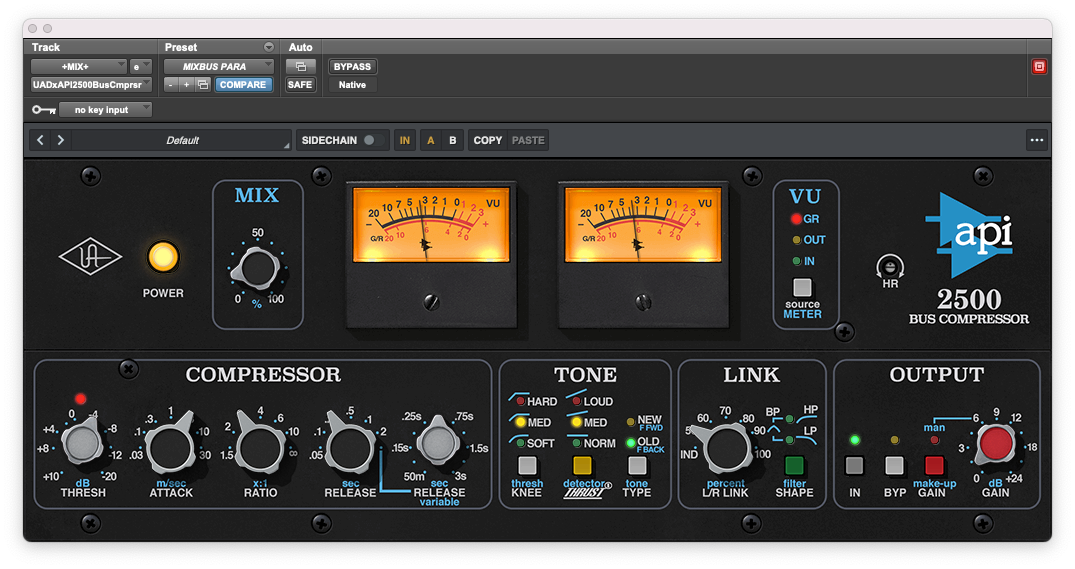
Parallel Compressor
UAD API 2500 here. I’m using a very subtle blend with heavier compression settings to bring up some low-level sustain with a slower release. Leaving the channels unlinked adds a slightly modulated excitement, which feathers in a little extra width to the mix. This subtle parallel element can become a potent enhancement tool on the mix bus, particularly as an aid to deepen the front to back image.
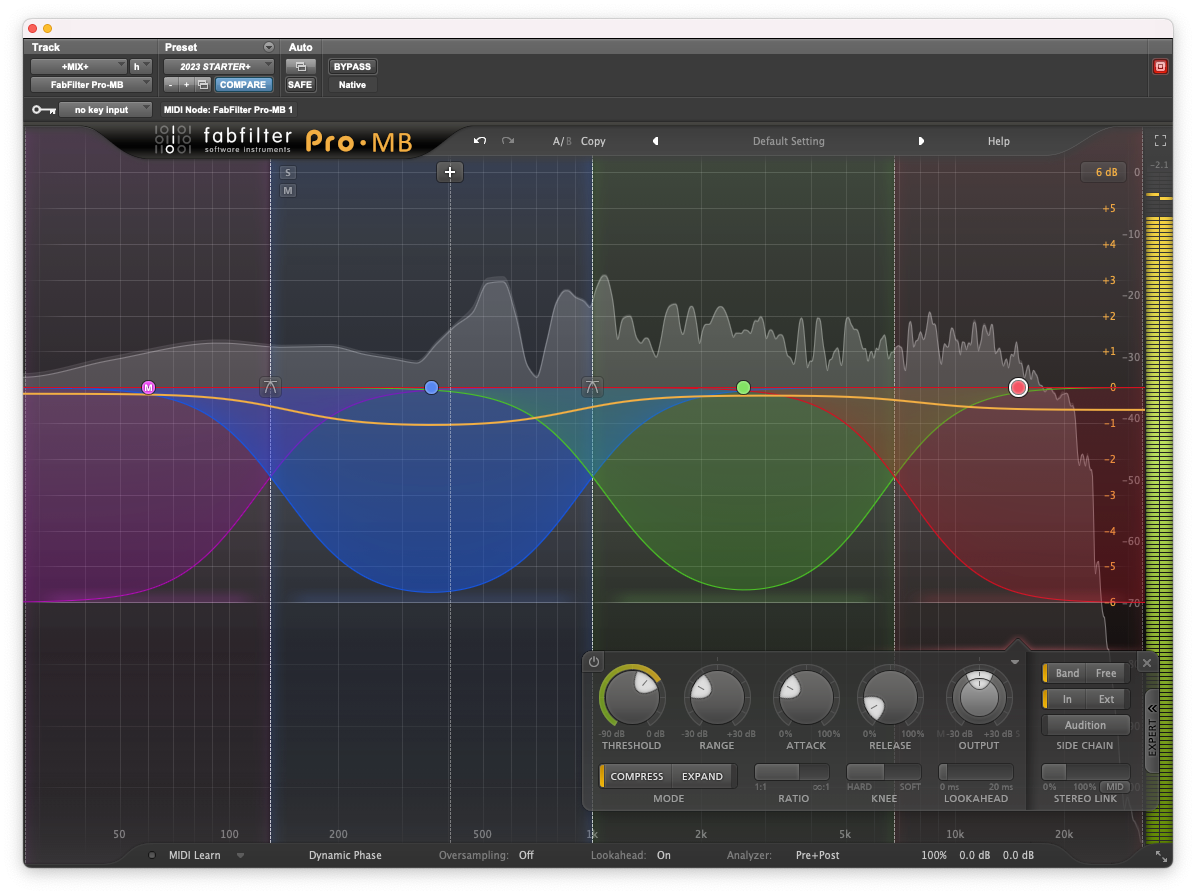
Multiband Compressor
Positioned for overall control and acting as a safety net (with intent!) during louder sections, this stage helps to ensure a consistent frequency response across the mix. My multiband of choice is the Fabfilter Pro-MB.
If I want the distinctive feel of mix compression (some pumping/tightness), I much prefer to lean into a multiband comp vs a single band counterpart (The Glue). This choice allows for dynamic control without compromising the soundstage so obviously.
Typically, I keep this stage bypassed at the beginning of a mix, then kick it in once the bass, drums, and any sustained elements are being cooked up. Then I’ll set it so that each band is gently bobbing, with emphasis on low-mid reduction. This helps keep the mix sounding open and even. I will gradually increase the GR towards the finalising stages of the mix, paying close attention to retaining or enhancing depth, dimension, and centre power.

Precision EQ
Further touch-ups, if required. I may want to make some very slight cuts, or automate a hi-shelf to come on in the final chorus, for example. Talking about the finest of details here.
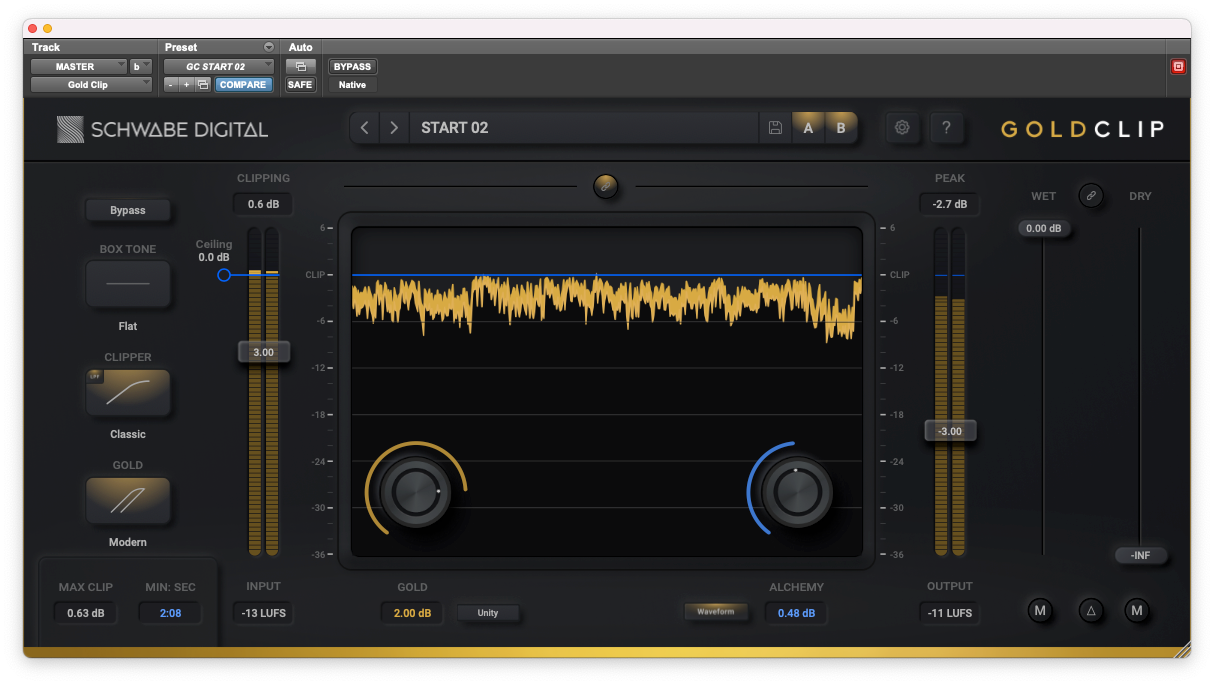
Clipper
Schwabe Digital Gold Clip: the newest, shiniest addition to my mix bus. I typically spend a lot of time with a tool before incorporating it into my template, but this one secured its place pretty swiftly.
I’ll begin by adding 2dB of gain using the Gold function. This is a non-linear gain, a sort of upward compression that increases perceived volume. As the mix progresses, I’ll activate the Alchemy function to mitigate any upper-mid frequency nastiness - a common challenge as the mix approaches its 'loudness potential.' All the while, I’m delicately shaving off 1dB or so of peaks to give my final limiter less to munch on.
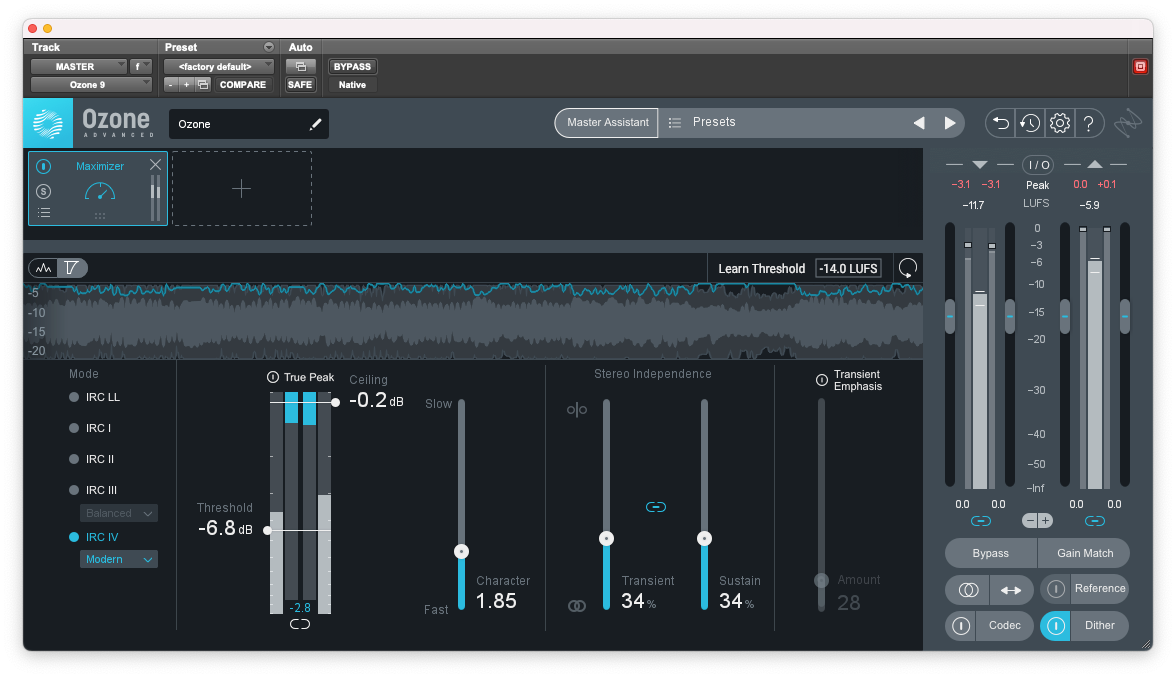
Limiter
Current choice is Izotope Ozone Maximizer. I feel as though limiting a mix and making changes within a limited mix deserve a whole separate discussion. I’ll address that in further articles. For now, I’ll share my starting point using Ozone IRC IV limiting.
I’ve chosen the modern setting for its intelligent release qualities. I prefer to unlink the action a bit to prevent the stereo image from being pulled more closely together.
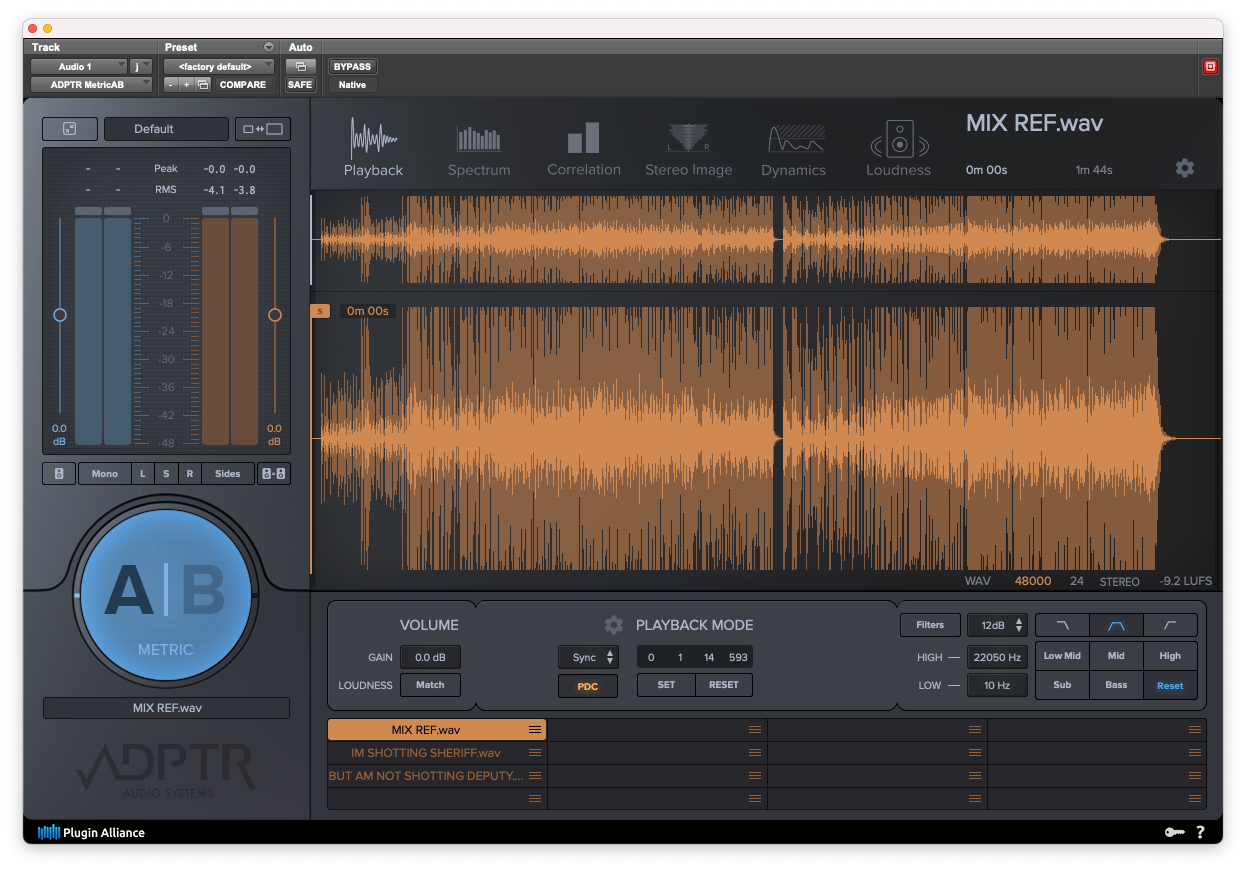
Metric AB: Referencing
Comparing against references using Metric AB is an integral part of my workflow, whether it's the pre-mix, mixes of other tracks from the same project, or comparing against expertly finished tracks when aiming to match specific qualities.